
Thinking about how you can make a free WordPress site?
The most straightforward approach to make a WordPress site is having your very own space name and web have. In any case, this may cost you couple of dollars.
Thus, in the event that you’re glancing around for expressways, at that point this guide is totally for you.
In this instructional exercise, I will tell you the best way to make a WordPress site without any preparation for nothing. You’ll additionally figure out how to get a free area name and a free web facilitating administration.
In any case, if it’s not too much trouble be reminded that free area and web have as a rule are not in the same class as premium and dependable web facilitating offers. It is essentially utilized for testing and exhibiting basic website pages as it were.
It isn’t prescribed for genuine bloggers, site proprietors, and designers.
Okay, how about we begin.
How To Make Your Own WordPress Website For Free
Fundamentally, so as to make your own WordPress site, you will require an area and a web have.
A space name is the thing that individuals type to get to your site. It’s your site’s location on the web.
Then again, web facilitating is the place your site lives. It’s your site’s home on the web.
Each site needs web facilitating.
An area name regularly costs $14.99/year, while web facilitating ordinarily costs $7.99/month.
This could be much in case you’re simply beginning.
Here I am going to tell you the best way to get a free space and a free facilitating administration.
I’m not discussing the free WordPress administration, subsequently, it doesn’t give you a space name yet a sub-area rather like this:
leammatthew.wordpress.com
What you’re going to get is a top-level domain.
Later piece of this instructional exercise, you’ll likewise figure out how to get a free web facilitating with Cpanel and keeps running on Linux Hosting.
Then again, in the event that you’ve just purchased a space name from Namecheap or some other area name enlistment center, you can pursue this instructional exercise.
Something else, pursue the means underneath.
Step 1: Get A Free Domain Name with Freenom.com
Freenom is the world’s without solitary area name supplier.
So feel free to open up www.freenom.com site and make a record.
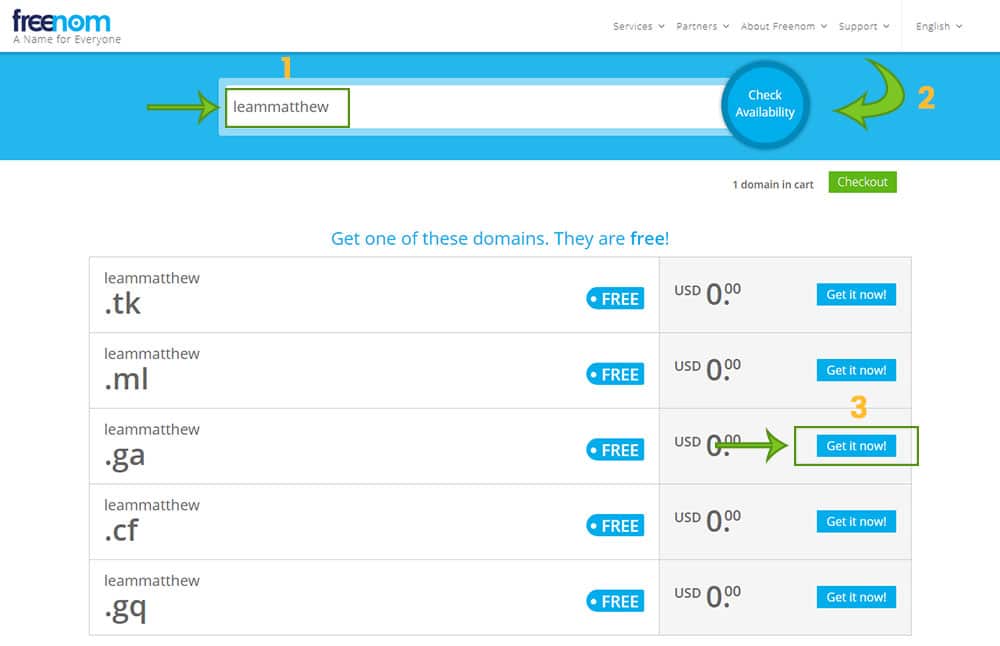
Presently, enter a name in the info field and snap Check accessibility to check accessible space name. For testing purposes, I will enter: leammatthew
You’ll be given accessible space name augmentation base on your info.
Select your preferred accessible space name with the relating augmentation by tapping on the Get it now! catch.
I’ve picked the .ga for this model.
Consequently, leammatthew.ga to be my area name.
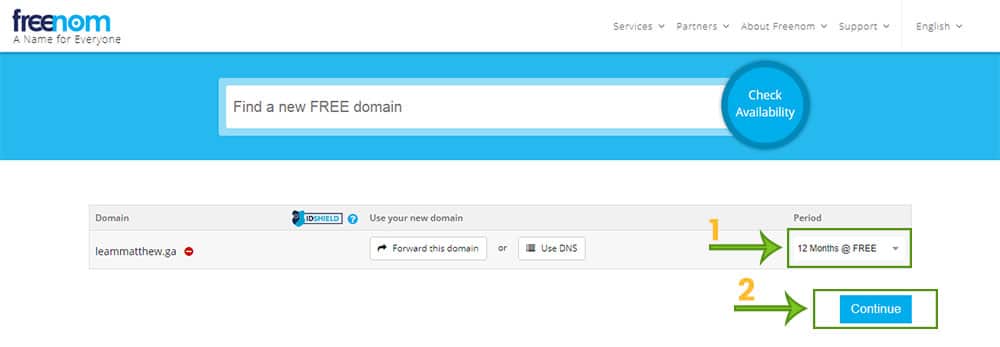
Now, this domain should be added to your cart. Just click on the Checkoutbutton that appears above it.
On the next page select a period of time. The default is set to 3 Months. I’ve chosen 12 Months, which is absolutely free.
And then hit the Continue button to proceed with the checkout process.
You may need to enter your email address and verify your account to continue to the next step.
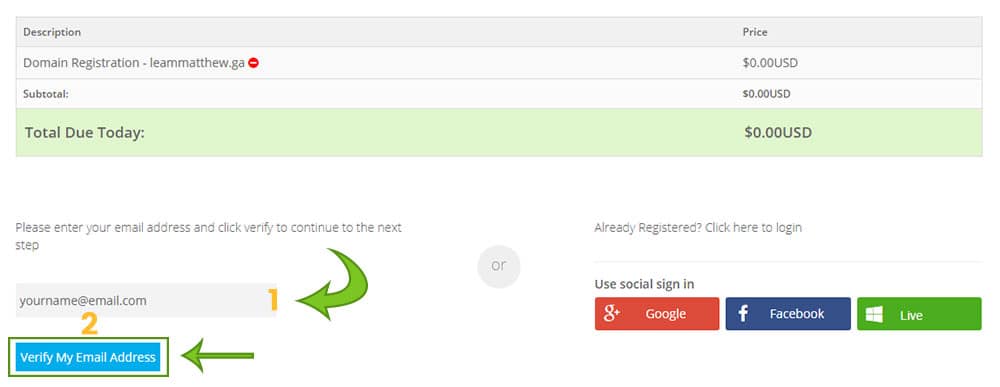
Go to your email and click on the link Freenom sent to you to verify your account. Supply your personal details and tick I have read and agree to the Terms & Conditions. Finally, click on the Complete Order button.
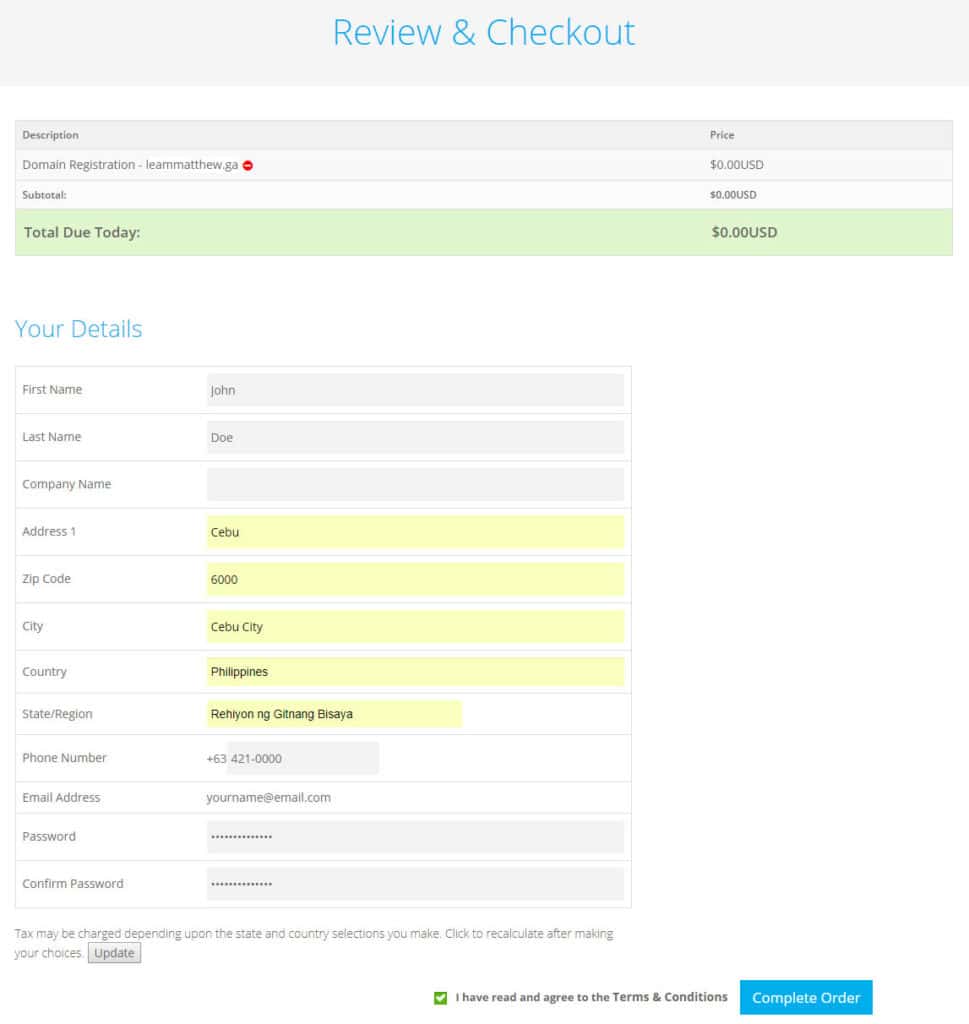
When you’ve provided every single vital detail, you ought to get your request affirmation in the blink of an eye (like the one you see from the screen capture underneath).
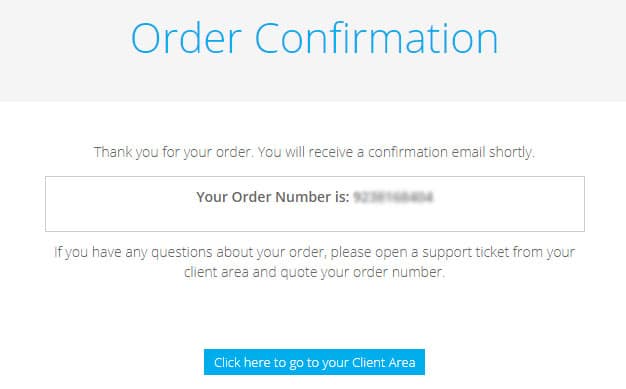
It’s just as simple as that. You have now effectively enlisted a free space name with Freenom.
This is what your Freenom customer territory resembles.

Step 2: Sign-up an Account With InfinityFree Free and Unlimited Web Hosting
InfinityFree is an autonomous free facilitating which expects to give solid free facilitating administrations to the majority.
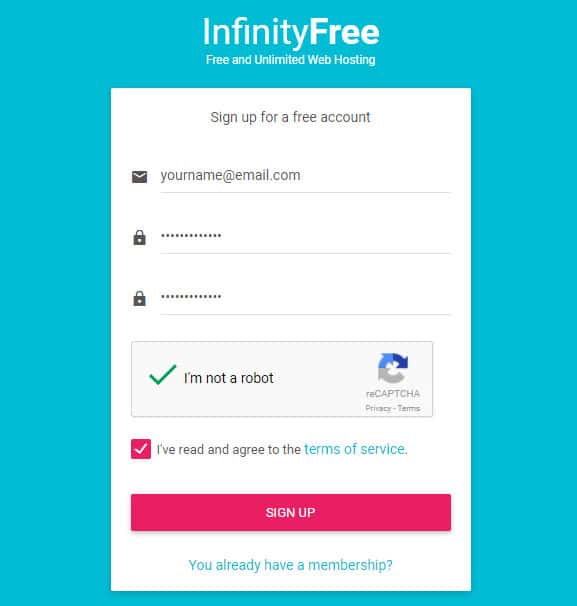
Visit www.infinityfree.net site and snap on the Sign Up Now catch.
You’ll be approached to enter the accompanying data:
Enter your email address
Enter a secret word for your record
Check I’m not a robot and
Consent to their terms of administration
An affirmation email will be sent to you. You’ll have to confirm your record to begin overseeing and setting up your free WordPress site with InfinityFree.
See additionally: 10+ Top Free Web Hosting Providers For Your Small, Portfolio, and Test WordPress Website 2019
Step 3: Setting Up Nameserver
Now that you’ve successfully signed up for both free domain name and web hosting.
Next thing you’ll need to do is setup the nameserver to point to InfinityFree.
To do this, log in to your InfinityFree account.
Once logged in, go to Accounts tab and click the Create Account button.

You’ll need to copy the highlighted nameservers and add these to your Freenom profile.
Open up a new tab in your web browser and log in to your Freenom account.
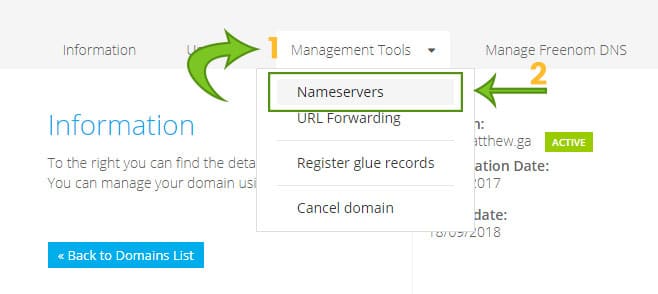
In the dashboard, click on the gear icon next to Manage Domain.
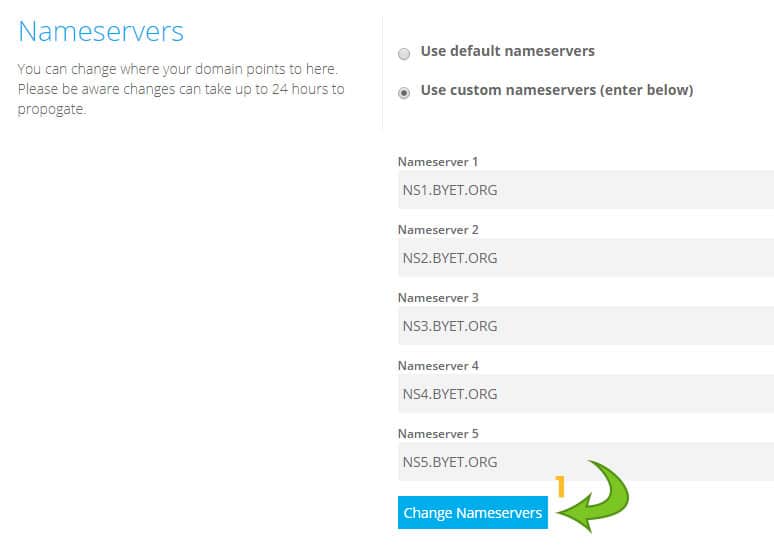
Now, select Nameservers from the drop-down under the Management tools tab and then tick next to Use custom nameservers (enter below).
You’ll need to enter the following nameservers provided by InfinityFree:
- NS1.BYET.ORG
- NS2.BYET.ORG
- NS3.BYET.ORG
- NS4.BYET.ORG
- NS5.BYET.ORG
Click on Change Nameservers to save your changes.
That is it, you’ve presently effectively arranged your new nameservers which will point to InfinityFree.
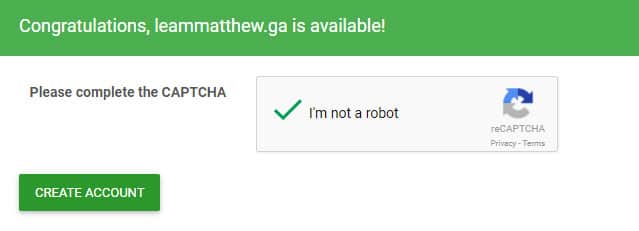
Back to InfinityFree make another record page, input your freenom area name and hit the inquiry catch.
Complete captcha and snap on CREATE ACCOUNT catch.
Trust that not many minutes will permit InfinityFree make the facilitating represent you.
Whenever done, invigorate the page and you should now have full access to Cpanel.
Step 4: Installing WordPress
The primary thing you have to do is sign in to your present Account Cpanel, you can do this in two different ways.
In the first place, is by tapping on the Control Panel catch straightforwardly from the Accounts page.
Note: Infinityfree enables you to have a limit of three space names for a solitary record. To include more sites, you have to move up to their premium facilitating administrations.
Second, is by tapping on the Manage catch which will open in another tab. At that point, you have to tap on the Control Panel catch.
Both of these work a similar way. This will open in another tab/window and consequently marked you in to your Cpanel zone.
Once signed in, go to Softaculous Apps Installer under the Software area.
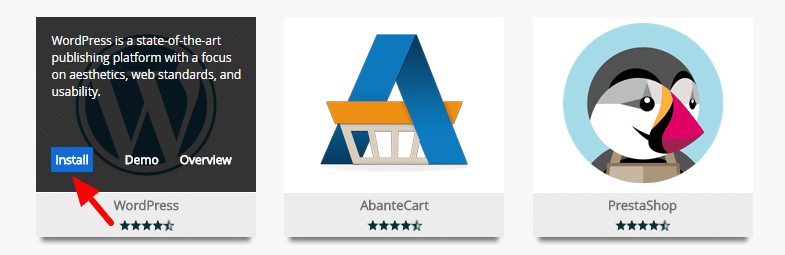
Another tab/window will open where you can choose an assortment of contents and cms.
Pick on WordPress and after that snap Install Now catch.
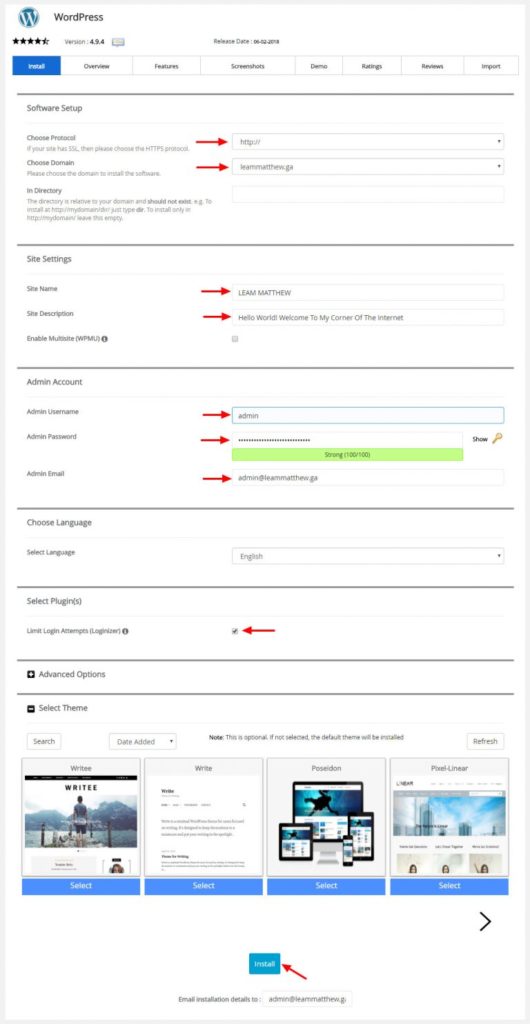
Software Setup:
Pick Protocol – pick whether you need your site to have a www or non-www. A HTTPS alternative is likewise accessible on the off chance that you have a substantial SSL endorsement.
Pick Domain – in the event that you have different areas, you can choose it here. Something else, utilize the default area for your record.
In Directory – you can determine a name here on the off chance that you wish to give WordPress its own index. Something else, leave this field unfilled.
Site Settings
Webpage Name – give your site an extraordinary name don’t stress you can generally change this later.
Site Description – like site name, you can generally change this later. Simply give it whatever portrayal you incline toward until further notice.
Empower Multisite(WPMU) – this is helpful on the off chance that you wish to run various WordPress locales from inside one WordPress establishment. Snap here to find out additional.
Admin Account
Administrator Username – this is what you’re going to use to login to the Dashboard. Make it one of a kind and difficult to figure for security purposes.
Administrator Password – consistently utilize a solid secret key. You can utilize a solid secret phrase generator to enable you to pick an incredible secret word.
Administrator Email – include a genuine email address here. You can utilize it to recuperate the record in the event that you overlooked your username and additionally secret word.
Choose Language
By Default, your website will be set to English. Otherwise, select a language of your choice here. Choose one from the drop-down menu.
Select Plugin(s)
Utmost Login Attempts(Loginizer) – I exceptionally suggest this. Empower this module to make your site more secure from programmers.
Select Theme
You can leave this section for now. You can always add/change new themes later.
Finally, when everything is set, hit the Install button.
Sit tight for couple of minutes until you see a triumph message.
You would now be able to visit your recently made WordPress site at the accompanying location – www.yourdomain.com or www.yourdomain.com/wp-administrator to the WordPress administrator region.
This is what my site resembles.

That is it. I trust this article helped you get familiar with the initial phase in making a WordPress site for FREE.
You should begin arranging your site, making posts/pages on your site, redo WordPress, making custom Menus and that’s only the tip of the iceberg. This guide will show you all that you need in addition to couple of progressively supportive assets beneath.
You may likewise need to check this article on 9 basic settings in the wake of introducing WordPress.

Increasingly Helpful Resources
Adding New Admin User To Your WordPress Site
Instructions to Backup a WordPress Site
Reset WordPress Admin secret phrase from phpMyAdmin
Must-have modules for WordPress
17 Ways To Secure Your WordPress Website From Hackers
Leave a Reply